From JPG to PXF in 10 Minutes – A Beginner’s Guide That Actually Works
Introduction
You have a logo sitting on your computer as a simple JPG. Maybe you designed it yourself or paid someone on Fiverr. Now someone asks for a PXF file, and you freeze. What even is that? A PXF file is a specialized embroidery or cutting file used by certain commercial machines. It holds stitch data, color changes, and path instructions. Without it, your machine sees nothing but a blank screen. So here is the good news: you do not need a degree in graphic engineering. You just need a clear path. And that path starts right now. In this guide, I will walk you through how to Convert Logo to PXF File Format even if you have never done anything like this before. We will keep it casual, keep it honest, and keep your stress levels low.
What Exactly Is a PXF File and Why Should You Care?
Let me break this down like I am talking to a friend over coffee. A JPG is a picture. It shows colors and shapes. But a PXF file is a set of commands. Think of it like a GPS for your machine. It tells the needle exactly where to punch down, how long to stay, when to lift up, and when to change thread. If you try to feed a JPG directly into an embroidery or laser machine, it will either refuse to open or spit out a garbled mess. PXF is a format that some popular home and commercial machines love because it keeps everything tidy. So if you ever plan to stitch your logo onto a hat, a bag, or a uniform, you will need this conversion. And no, paying someone every single time is not your only option.
Start With a JPG That Does Not Embarrass You
Before we do anything fancy, look at your JPG. Really look at it. Zoom in. Is it blurry? Are the edges jagged? Does it have a weird background color that should not be there? If you answer yes to any of those, fix it first. You cannot polish a turd, as the old saying goes. Open a free tool like GIMP, Photopea, or even Canva. Crop out any extra space. Increase the contrast so the shapes pop. Convert the background to transparent if possible. And here is a pro tip: resize your image to the exact size you want the final stitch to be. If you need a three inch logo, resize your JPG to three inches wide at 300 DPI. This saves you from scaling nightmares later. A clean JPG leads to a clean PXF. Garbage in, garbage out. Always.
The Software You Actually Need (No Expensive Secrets)
You do not need thousand dollar software to make this happen. I promise. For converting JPG to PXF, you have three solid options. Option one: InkScape with the Ink/Stitch extension. Totally free. It has a learning curve, but plenty of YouTube tutorials hold your hand. Option two: a dedicated online converter like Convertio or EmbroideryWare. These are paid but cheap, usually a few dollars per file. Option three: a trial version of professional software like Wilcom or Hatch. Most give you thirty days for free. That is plenty of time to convert all your logos. Whatever you pick, make sure it lists PXF as an export format. Not all embroidery software supports PXF because it is less common than DST or PES. So double check before you install anything.
Step by Step: From JPG to PXF in Ten Minutes
Alright, roll up your sleeves. Open your chosen software and import that clean JPG. Most programs have an import button or drag and drop. Once the image appears on your canvas, do not click auto-digitize yet. First, set your canvas size to match your final product. Then, use the trace tool. The software will try to outline your shapes. You will see a bunch of nodes or points. Delete the ones that look wrong. Focus on the main outline of your logo. Ignore tiny details for now.
Next, assign stitch types. Large solid areas get a fill stitch, which looks like a brick pattern. Thin lines and outlines get a satin stitch, which looks like a shiny braid. Your software may have buttons labeled fill, satin, or run stitch. Click on each shape and pick the appropriate one.
Now set your stitch density. This controls how close the stitches sit to each other. A density of 0.4 millimeters works for most fabrics. Too dense and the fabric puckers. Too loose and you see the background. You will need to test this, but start at 0.4.
After that, assign thread colors. Your software has a color palette. Match it as close as possible to your original JPG. Do not worry about exact brand matches right now. Just get the general hue.
Finally, hit the convert or digitize button. The software processes your image and spits out a preview. Zoom in on that preview. Do you see weird gaps? Overlapping lines? Stitches that jump across empty space? Go back and adjust your nodes or stitch types. Run the conversion again. Once the preview looks clean, click export. Choose PXF from the dropdown menu. Name your file something simple like "my_logo_final.pxf." Save it to your desktop. That whole process takes about ten minutes once you get the hang of it.
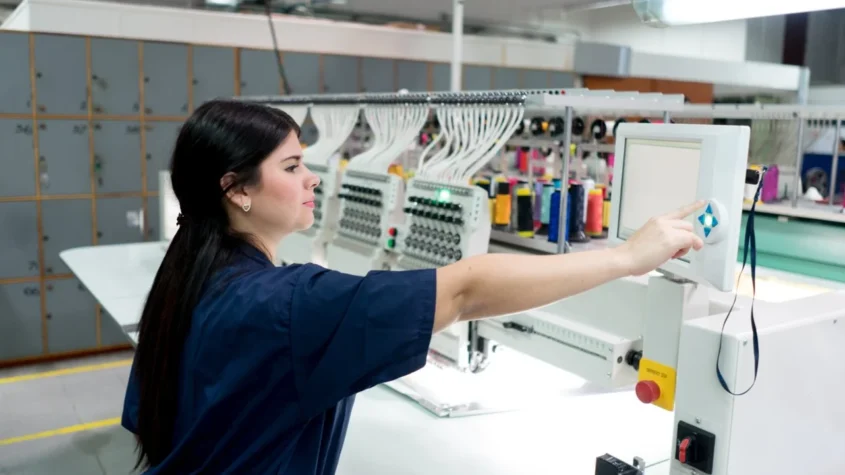
How to Test Your PXF File Without Ruining Your Good Fabric
You did it. You have a PXF file. Do not load it onto your expensive machine and press start on your favorite hoodie yet. Stop. You need a test run. Grab a piece of scrap fabric that feels similar to your final material. Hoop it properly, meaning the fabric should be drum tight but not stretched. Load your PXF file onto your machine via USB or direct connection. Run a small test at half speed. Watch the needle. Does the thread snap? That means your density is too tight. Does the design look stretched or squished? That means your hoop tension is off. Does the machine skip around randomly? That means you have stray nodes in your tracing. Make one adjustment at a time, then test again. Do not change five things at once or you will never know what fixed the problem. Keep testing until the sample looks clean and matches your original JPG in shape and color.
Common Beginner Traps and How to Walk Around Them
I have seen beginners make the same mistakes over and over. Let me save you the headache. First, tiny text. If your JPG has words smaller than a pencil eraser, forget it. Embroidery cannot handle that. Second, too many colors. Every color change adds time and thread waste. Stick to four or five colors max. Third, forgetting stabilizer. Stabilizer is a backing material that keeps your fabric from wrinkling. Use cutaway stabilizer for stretchy fabrics like knits. Use tearaway for stable fabrics like denim. Fourth, ignoring the underlay. Underlay is a base layer of stitches that anchors everything. Most software adds it automatically, but check that box. Fifth, assuming one size fits all. A design that stitches perfectly at four inches will look like a mess at one inch. Resize carefully or re-digitize for different sizes.
When to Hit Pause and Call a Professional
I love a good DIY project. But sometimes calling a professional digitizer saves you time, money, and frustration. If your logo has more than six colors, includes a photo realistic element, or uses gradients, hire someone. Also hire someone if you have a deadline tomorrow and you have never touched digitizing software. A good digitizer charges between ten and thirty dollars per logo. They will ask for your JPG, your desired size, your fabric type, and your machine model. They will send you back a perfect PXF file and often a test stitch proof. You can find them on Etsy, Upwork, or specialized embroidery forums. Look for reviews that mention communication and turnaround time. A pro will happily answer your questions. An amateur will disappear after taking your money.
Conclusion
You started with a basic JPG and ten minutes of your time. Now you understand what a PXF file is, why you need one, and exactly how to create it yourself. You know to start with a clean image, pick the right software, assign stitch types carefully, test on scrap fabric, and avoid common beginner traps. You also know when to ask for help. That is the whole journey. No magic. No gatekeeping. Just clear steps that work. So open that JPG folder on your computer, pick a simple logo, and give it a try. Your first attempt might look a little rough. Your second will look better. By your third, you will wonder why you ever felt nervous. Go make something worth stitching.